Showing posts with label diy. Show all posts
Tuesday, July 26, 2016
Tips For Everyday Life
On my searches through the internet I have come across a few posts I wanted to share with my loyal followers. Please like and share these bloggers if you enjoy them. They need the likes too.
First up is a brandy new meal planning list. Everyone gets sick of the same old thing every week. Chicken, hamburger, pizza, mac and cheese and so on and so on. So I am always on the look out for something different or something interesting. I like breakfast for dinner for sure and anything stuffed inside dough is sure to be yummy.
This blog has some great ideas and recipes to try out.
Babies And Seeds - Meal plans
My family lives on a single income at the time being so we have to budget tightly. Here are some interesting ways to do that and some of these I do myself and have had great results. No budget cant be fixed.
Try these tips at
Babies And Seeds - Budget Trimming
Sunday, May 8, 2016
Easy DIY Character Table Updates
I'm all about upcycling. For one thing I'm broke and for another upcycled pieces are usually the most interesting. It is probably a blessing that I don't usually get out to flea markets often because I would buy all the pieces, then I need a craft store and a hardware store.
By the way if you like crafting or upcycling check out Hobby Lobby, that place is amazing.
Anyway, A couple years ago I got my daughter one of those character tables with two chairs and an aluminum frame. Well, she doesn't really watch that show anymore and its not the cutest thing to look at. Especially when moved to the living room for playdates and coloring. So, a friend of mine got me a glue gun, (I know, I should have gotten one years ago.) and I had some leftover fabric so I started measuring pieces and cutting out each section. I got lucky and had just enough to do the whole set.
The directions are simple.
The back and bottom of the seat and the table top are screwed in with brackets. Unscrew em.
Lay the piece on the fabric and cut out. Doesn't have to be perfect you will be stretching it but leave enough to glue down.
All I did was use the glue in the corners of each piece to keep the shape and to keep the fabric from moving over the plastic.
Glue sections down on the back by gluing a 3 inch strip at a time and pulling the fabric tight. (I used clothes pins to hold the fabric down while the glue dried. It doesn't take long but it prevents you from pulling free already glued fabric.
Trim the extra.
screw back together.
Whole thing took like half an hour.
By the way if you like crafting or upcycling check out Hobby Lobby, that place is amazing.
Anyway, A couple years ago I got my daughter one of those character tables with two chairs and an aluminum frame. Well, she doesn't really watch that show anymore and its not the cutest thing to look at. Especially when moved to the living room for playdates and coloring. So, a friend of mine got me a glue gun, (I know, I should have gotten one years ago.) and I had some leftover fabric so I started measuring pieces and cutting out each section. I got lucky and had just enough to do the whole set.
The directions are simple.
The back and bottom of the seat and the table top are screwed in with brackets. Unscrew em.
Lay the piece on the fabric and cut out. Doesn't have to be perfect you will be stretching it but leave enough to glue down.
All I did was use the glue in the corners of each piece to keep the shape and to keep the fabric from moving over the plastic.
Glue sections down on the back by gluing a 3 inch strip at a time and pulling the fabric tight. (I used clothes pins to hold the fabric down while the glue dried. It doesn't take long but it prevents you from pulling free already glued fabric.
Trim the extra.
screw back together.
Whole thing took like half an hour.
She loves it!
Feel free to comment with any questions or comments. I will be doing another gardening update soon, this year is going to be epic, I am just waiting for the sprots to get a little bigger before I post. There is also some new stuff coming from my reddit series so keep an eye out for that. Lots more photos.
Sunday, June 14, 2015
DIY Wood Paneling Update
High five for productivity today. With the news of the new baby coming I sort of had to get my butt in gear and get a lot of these projects done as quickly as possible to make room for all the baby chairs and swings and all that bulky pieces of furniture you use for about 4 months and haul back down to the basement. But awwww, aren't they so cute on that lil' bouncer that takes up the space of two kitchen tables and you have kicked with your baby toe 4,627 times. Any how, I had some pretty high ambitions for our new house and the Pintrest rampage only fueled my appetite for industrial pallet furniture and dangling, energy efficient, low watt, bare bulb, pendulum lights. Then I realized... I'm not a freakin New York hipster and I don't have that kind of money. So I decided to try a few more manageable jobs.
The two bedrooms in the back of the house were paneled with this light colored fake wood paneling. This does not work for me! Well, I painted everything white, which helped with the panels, but it was so boring and plain, this also doesn't work for me. Now, I am here to tell you that you really can successfully update a trailer without breaking your wallet into tiny little pieces.
The final project was fairly simple. If you painted the panels correctly the first time with the white you should have no issues. I highly suggest sanding the paneling first to give the paint something the stick to. When I removed the painters tape it took the paint with it and had to be patched up and it is not all that pretty for now. However, the stripes look lovely and when the second room is finished it will look a bit more polished.
The two bedrooms in the back of the house were paneled with this light colored fake wood paneling. This does not work for me! Well, I painted everything white, which helped with the panels, but it was so boring and plain, this also doesn't work for me. Now, I am here to tell you that you really can successfully update a trailer without breaking your wallet into tiny little pieces.
![]() |
| Before! |
![]() |
| AFTER! |
Any questions on this or any other DIY project I have done feel free to message me or add a comment.
Friday, April 17, 2015
Tips For The Anxious Gardener.
I have been on the edge of my seat waiting for all this GD snow to melt. We got 3-4 feet this year and of course my husband and I bought a house and started construction during the first of approximately 5 consecutive blizzards. Needless to say we have all been glued to the weather channel for some sign that the sun and heat would, eventually, return. Anyhow, I jumped the gun a little bit this year with my indoor green house and the seedlings so I thought I could spare others the frustration of dying seedlings.
First I started my seeds about 2 weeks to early. That doesn't seem like much but in New England we only get 4 or 5 warm months a year to grow and the frost will get you every time. So I quickly realized that larger plants like squash and sunflowers grow really, really fast. I mean seriously, especially in a greenhouse. My advice is if the seed itself is on the larger side, plant those last. There are lots of websites to give you advice on when to plant in your region, I checked them out and filled a planner. Then I planted stuff early anyway, cause ya know, I'm smaht.
Second, I recommend being very organized with your labeling and time scales. Seriously, stuff gets jumbled very easily as seedlings sprout and need to be turned and moved toward the sun. At this point I'm going to have to plant the unrecognizables together and move them when I figure out what they are.
Third, Yes it is, in fact, warm out. However, it's still friggan cold at night. I have already killed several seedlings that were ready for planting and a grapevine that I was very excited about. (Don't worry I am totally getting another one.) So, seriously you have to be realistic about the time of year and that sometimes you are still trying to shed the freezer burn from winter and your baby plants are not equipped for that cold.
Finally, don't forget there are projects that can be done while you wait to be elbow deep in worm castings. Climbing vegetables are a great way to save garden space but you need trellises. I went the cheapo way and screwed together some 2x4's and stapled trellis netting to it. Took five minutes and it's pretty solid. However, since you have this time you could always paint it up make it look fancy or something. Get your potted plants settled in their homes in the house, watch the sun through the windows to pick the sunniest rooms. At this point you can also get those herbs growing, they do just fine indoors and are easily set into window boxes and the like. (PS. For the life of me I can not get my Rosemary to grow to I advise finding a nursery or garden center for clippings or the whole plant. Keep in mind that basil takes forever to sprout and parsley and cilantro grow tall and a little wild so you may need a cage to direct them up, eventually.)
Be patient my loves it will be soon be warm enough to reap the rewards of your hard work and patience. Every year, I have found, you learn a little more and you get a little better so even if it doesn't work out as planned this time you have another whole year to try again and learn some more.
How have you guys been doing? Are you growing anything out of the ordinary? I am trying pumpkins and climbing strawberries.
![]() |
| Clearly not happy plants. |
First I started my seeds about 2 weeks to early. That doesn't seem like much but in New England we only get 4 or 5 warm months a year to grow and the frost will get you every time. So I quickly realized that larger plants like squash and sunflowers grow really, really fast. I mean seriously, especially in a greenhouse. My advice is if the seed itself is on the larger side, plant those last. There are lots of websites to give you advice on when to plant in your region, I checked them out and filled a planner. Then I planted stuff early anyway, cause ya know, I'm smaht.
![]() |
| Even the toddler is confused about spring. |
Second, I recommend being very organized with your labeling and time scales. Seriously, stuff gets jumbled very easily as seedlings sprout and need to be turned and moved toward the sun. At this point I'm going to have to plant the unrecognizables together and move them when I figure out what they are.
Third, Yes it is, in fact, warm out. However, it's still friggan cold at night. I have already killed several seedlings that were ready for planting and a grapevine that I was very excited about. (Don't worry I am totally getting another one.) So, seriously you have to be realistic about the time of year and that sometimes you are still trying to shed the freezer burn from winter and your baby plants are not equipped for that cold.
Finally, don't forget there are projects that can be done while you wait to be elbow deep in worm castings. Climbing vegetables are a great way to save garden space but you need trellises. I went the cheapo way and screwed together some 2x4's and stapled trellis netting to it. Took five minutes and it's pretty solid. However, since you have this time you could always paint it up make it look fancy or something. Get your potted plants settled in their homes in the house, watch the sun through the windows to pick the sunniest rooms. At this point you can also get those herbs growing, they do just fine indoors and are easily set into window boxes and the like. (PS. For the life of me I can not get my Rosemary to grow to I advise finding a nursery or garden center for clippings or the whole plant. Keep in mind that basil takes forever to sprout and parsley and cilantro grow tall and a little wild so you may need a cage to direct them up, eventually.)
![]() |
| Helping me do the yard work to prepare for garden season. |
Be patient my loves it will be soon be warm enough to reap the rewards of your hard work and patience. Every year, I have found, you learn a little more and you get a little better so even if it doesn't work out as planned this time you have another whole year to try again and learn some more.
How have you guys been doing? Are you growing anything out of the ordinary? I am trying pumpkins and climbing strawberries.
Thursday, February 26, 2015
DIY Living Room Reveal
So what did we do with this steal of a house? Well, for starters it really has good bones, it's a three bed, two bath manufactured and set on a basement. (bonus!) So... we gutted it. Ripped out cabinets painted EVERYTHING! Seriously, I don't ever want to paint again and it isn't done yet. Anyway, the place is really starting to come along so I wanted to show you how it's going by room,
![]() |
| Before! |
Sadly I don't have any before photos of the other side but here is the after anyway.
We ripped out the ugly carpeting and carpet pad and put in some laminate. We chose Saratoga Hickory, it is hand scraped so it has a nice texture on it and much less shine than your typical pergo floors. I picked up some black out curtains and a double curtain rod for the sheer panels. (I think it makes it look classier but that's just me.) All the furniture came with us, (and will be replaced soon I hope.) The floors were 99 cents/sq ft so to do all the living space with enough leftover to, possibly, do another room it only cost about 700 bucks.
All in all this room was one of the easiest because it required very little construction. I'm sure in the above photo you can see the half door. Those walls were knocked down and will be replaces by a knee wall on one side and a railing on the other. (Father-in-law's handiwork.) My pride and joy is the kitchen. I don't like the paint I used but otherwise is looks much better.
If you have any questions on how we did this go ahead and write a comment and I will get right back to you. There will be much more to come very soon.
Wednesday, February 18, 2015
Snack Mix For All
Warning: My daughter has no known food allergies so I have included peanuts in the recipe. If your child is allergic to nuts please don't attempt to feed some to them.
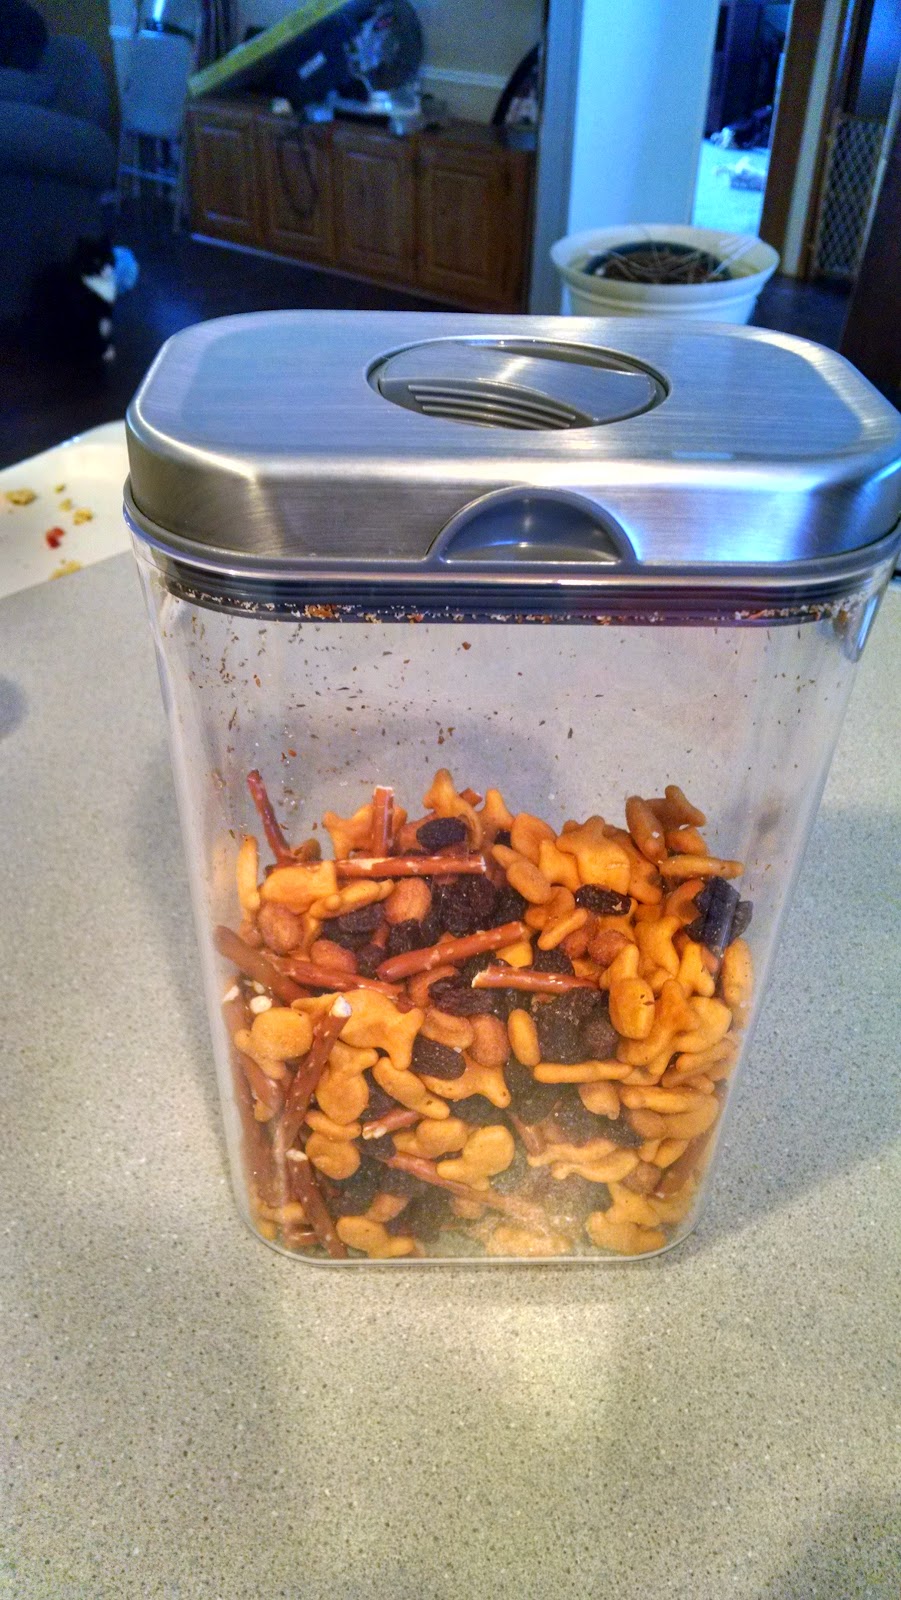
Earlier I posted my snack pack ideas here and mentioned my snack mix. This stuff is magic to kids. Have you even been ready do give your little one a snack and they can't decide what they want or won't eat what you gave them. Fret no more fellow mommies! Seriously, it's as simple as throwing all kinds of similar ingredients into a container and going on about your day.
This bad boy is filled with pretzles, goldfish, raisins, honey roasted peanuts and cheerios. Really anything can be used in these. I have mine in an air tight storage container but mason jars work great too. You can always add things like dried fruit, different nuts, seeds and even those yogurt dipped snacks.
Be creative and if your kids are old enough this could be a great activity for them to do during the week. One less thing you have to do and we all know... there is too much to do.
Good Luck!
Earlier I posted my snack pack ideas here and mentioned my snack mix. This stuff is magic to kids. Have you even been ready do give your little one a snack and they can't decide what they want or won't eat what you gave them. Fret no more fellow mommies! Seriously, it's as simple as throwing all kinds of similar ingredients into a container and going on about your day.
This bad boy is filled with pretzles, goldfish, raisins, honey roasted peanuts and cheerios. Really anything can be used in these. I have mine in an air tight storage container but mason jars work great too. You can always add things like dried fruit, different nuts, seeds and even those yogurt dipped snacks.
Be creative and if your kids are old enough this could be a great activity for them to do during the week. One less thing you have to do and we all know... there is too much to do.
Good Luck!
Labels:
diy,
grateful,
happy kids,
hungry kids,
kids,
Mom,
recipes,
save money,
save time,
snacks,
toddlers,
toddlers diet
DIY Snack Packs

Traveling with a toddler is quite the endeavor sometimes. Have you ever noticed they eat.... constantly! My rugrat has always been a good eater but this also means she wants to eat all the time and packing snacks in a diaper bag doesn't always work out as planned. Snacks get left in the bag and go stale or the apple sauce will spoil when the car heats up and cheerios... friggan... everywhere!
While my methods are still in, what I like to call, the planning stages, I have found a few hacks over the last year or so that have made my life slightly easier and I'm here to share them with you guys.
I found this idea on Pintrest and adjusted it to suit us.
My daughter had mostly formula as a baby and I had dozens of these plastic containers lying around. (I also use them to store crafts like beads, pom poms, washi tape and rogue crayons. Highly recommend holding on to a few of these if you are going to buy them anyway. The scoops also work great for the DIY detergent I posted yesterday. DIY Laundry Detergent) A few staples I throw in these are oatmeal, fruit cups or fruit snacks, animal crackers and those squeezy applesauce packets. You can obviously adjust the contents for whatever you kids may prefer just don't forget to take some of the perishable stuff out and throw it in the fridge when you get where your going. These little guys are perfect for a night at the Grandparents house. (My parents don't usually have a lot of kid type food around.) A trip to the park or the beach. (Wishful thinking!) I also make a snack mix that she just loves and it saves a little packing time when getting ready to go. I will be posting my snack mix soon so you guys can give it a shot.
As always feel free to share and comment away and I hope this helps you guys in your own planning stages.
Labels:
diy,
happy kids,
hungry kids,
recycle,
reuse,
save,
save money,
save time,
toddlers,
toddlers diet,
upcycle
Tuesday, February 17, 2015
DIY Laundry Detergent
Recently I was asked about making my own laundry detergent due to a FB post I posted the other day. Well, it's true, for around 30 bucks I was able to make over a years worth of detergent and it works great. The next time you hit the grocery store go ahead and pick up a few ingredients.
3 Fels Naptha bars. (These are with the regular detergent, in fact most of these things will be in the same aisle.)
1 box Arm and Hammer Washing Soda
1 box Arm and Hammer baking soda
1 box Mule Team Borax
1 tub Oxi-Clean stain remover
1 bottle of Purex crystals, any scent
Alright, you got a bunch of random cleaning stuff, now what? Brace yourself, this part gets a little complicated....
Grate the Fels Naptha into a powder. then, mix it all together. I recommend using the oxi clean tub to keep a small usable amount by your washer and keep the rest in a bucket in the basement or garage.
As a nanny I am constantly cleaning up gross stuff. Blown out diapers, spilled food and the ever present milk residue that gets literally everywhere. This stuff cleans great and smells awesome, you know, as awesome as laundry can smell.
You can also use a little distilled white vinegar and either a cake pop pan or an ice tray and press the mixture into handy tabs. I tried it with half of the mixture and it came out just fine. I recommend using only half the space in an ice tray as it wont completely dissolve and you will have little white stuff from the undissolved solids. Personally, I just use a baby formula scoop and use two or three depending on the load. (Don't use a scoop in the detergent then make a bottle with it. Have one designated for the laundry room. I don't feel it is necessary to inform you all of this but well.... There are some people...)
So there you have it, I have saved hundreds if not thousands in laundry detergent. Don't forget to use walmarts savings catcher app to save even more money and an occasional bleach run through the wash will help keep your washer clean and avoid that mildew smell some washers tend to acquire over time.
Labels:
adorable,
clean kids,
clean laundry,
deals,
diy,
kids,
laundry,
life hacks,
Mom,
save,
save time,
saving money
Wednesday, December 3, 2014
Handmade Gifts For Boys
So I was given an impromptu vacation. This happens sometimes with child care, the family takes a vacation and you are workless until they return. Fortunately I still get paid when they take time off so I still get a little money. Fortunately, this gives me some time to finish up some gift wrapping and getting a few of my little DIY gifts complete so I am excited about that. Not to mention all this one on one time I get with the little one, (she spends most of her time playing with the boy I nanny and rarely has time for mommy.)
Now that my scarves are done, (check my last post for more on that,) I have time to get the boys fort kit done. These clever little things go for anywhere between 30 and 40 bucks. I'm not terribly certain its worth all that so on Black Friday we went out and got just the pieces. I have two nephews so everything is doubled.
I grabbed:
All you really need to do is cut a piece of burlap about double the width and length of the bags the sheets came in. You just want to make sure everything is going to fit inside. Fold over the long sheet of burlap and sew the sides. Turn it right side out and there is your bag. I took another strip of burlap very narrow and pretty long. Putting slits in the top of the burlap bag to weave your 'ribbon' through as a sort of tie.
These are the pieces all pulled together.
This is the final product. I'm going to embelish the front with some paint so it says Fort Kit and tie the top again to make it look a little more polished. I will update as it becomes completed.
I hope the boys like love them and have lots of fun.
If you liked these projects follow me for more great DIY on a budget.
See you soon.
Now that my scarves are done, (check my last post for more on that,) I have time to get the boys fort kit done. These clever little things go for anywhere between 30 and 40 bucks. I'm not terribly certain its worth all that so on Black Friday we went out and got just the pieces. I have two nephews so everything is doubled.
I grabbed:
- Two flat sheets. (I got twin sized just because of limited space and I know their families will have old sheets that can also be used.
- Clothes Pins (You can get a ton for very little money)
- A mini child's flashlight
- Last but not least a book to curl up with in there. (The boys are pretty big on books so we play that up where we can.)
These are the pieces all pulled together.
I hope the boys like love them and have lots of fun.
If you liked these projects follow me for more great DIY on a budget.
See you soon.
While I Was House Bound
Here in New England our winters get pretty brutal and we are all mostly used to it. It is common to lose power a few times. Well, we got hit early this year and had some down line and bitter temperatures. Regardless we cooked Thanksgiving dinner on the grill, you read that correctly, on the grill. The sides were all done on little propane camp stoves and we warmed the appetizers in ceramic dishes on the wood stove. To top it all off we had frosty cocktails and a little warming brandy to snuggle up to. All in all it was a pretty cozy evening. Even the baby didn't seem to mind since all the attention was on her and not the iPad or the TV. Anyway, since all the crummy weather came through it has been too cold to go outside so I decided to keep myself busy with some inane project. I cant really work on my furniture indoors and we are still working on the offer for the new house so I needed a relatively short project.
Crochet! Time consuming while still being productive. Well after about 45 minutes and two inches into a blanket I needed something a little more..... fun. Arm knitting seems to be the new fun thing so I figured if I do well I have holiday gifts and if I mess it up I have dog blankets. Win, win!
I am pleased to announce.... It worked beautifully and they look nice rather than like a child knotted a bunch of strings together. (I have a habit of busting out some epic pintrest fails from time to time.)
I will warn you, as I quickly found out, one pull on one of the chains and you will never get it back in the right place so try not to let little hands grab at them. The cuff with the button was just a quick single crochet stitch with a double crochet at the end to make the hole. This thing works great for hiding the seam where the ends are stitched together. These took about 15 to 20 minutes each and together they used about 2 and a half skeins of super bulky and bulky yarn. Make sure you get the fluffy stuff to fill in the holes a little.
Any of my projects you would like to know more about feel free to message me or leave a comment. I don't mind doing tutorials if you need one. I'll be back soon with some more projects as the Christmas gifts start coming together. Thanks guys!
Crochet! Time consuming while still being productive. Well after about 45 minutes and two inches into a blanket I needed something a little more..... fun. Arm knitting seems to be the new fun thing so I figured if I do well I have holiday gifts and if I mess it up I have dog blankets. Win, win!
I am pleased to announce.... It worked beautifully and they look nice rather than like a child knotted a bunch of strings together. (I have a habit of busting out some epic pintrest fails from time to time.)
Any of my projects you would like to know more about feel free to message me or leave a comment. I don't mind doing tutorials if you need one. I'll be back soon with some more projects as the Christmas gifts start coming together. Thanks guys!
Wednesday, October 22, 2014
Food For Tiny Fingers
It's official, my daughter is 1 year old!
We celebrated her birthday over the weekend followed by my husbands party and it went very well. This morning my husband asks me, as he is making her bottle, "Aren't we supposed to be weaning her off of these soon?" Crap, he's right. That means more finger food, relatively scheduled meals, make ahead breakfasts. (I am out of the house by 6am and home with the other little one but 7am so breakfast is already a pain.) Then I start wondering where am I going to put all these meals and tiny tupper ware containers. Well, I think I've got it.
So There are several things I pick up for my lil munchkin to eat.
Cut up green beans, peas, carrots, broccoli chunks, any frozen or canned veggies really. Throw some in a cup and microwave or grab a small pot and toss in your veggies. Storage is simply your pantry or canned goods cabinet and they take seconds to make. Pair them with some fruit or pretzels.
I will hard boil some extra eggs and throw them back in the fridge for a pre-made breakfast or an afternoon snack.
Cook an extra chicken breast or meatballs when you make dinner. Bonus: split it with the kids and make some quesadillas for lunch or a salad and you got your lunch too with little work.
I am a big fan of chunks of block cheese with some fruit and crackers or cheerios. All very easy things to put together.
With all these little finger foods filling up the fridge and pantry I decided to throw together some Martha Stewart and Betty Crocker and up-cycled some old formula containers to use as storage.
Using small zipper bags and mini storage you can set these up for where ever you need them. For instance one will have small bags of cheerios, (instead of bulky boxes in the pantry.) pretzles, fruit snacks, snack pouches, really anything.
For the refigerator snacks like fruits and veggies I have small storage boxes,
One of these little guys can slide out of one side of your fridge and all your toddler to-go bags remain contained in one place.
Last thing I am trying to do more of is making foods ahead, as I mentioned cooking a little extra the night before so you are all set for lunches and snacks the next day but I also like to load up the freezer. (Depending on space you can use those containers above to hold bags of freezer food.)
I like to make french toast sticks, mini pancakes, mini muffins etc. Its a good project for a lazy Sunday when I have an extra pair of hands for the baby. You can make up a ton of them in the time it would take to make a regular breakfast and on those busy mornings you toss 'em in the oven or microwave and the kids are happy. Not to mention all that breakfast stuff will make your house smell all yummy!
A new one I want to try is yogurt bites. Line a baking sheet with parchment paper and use an icing bag (or a ziplock with a hole cut in the corner.) and make dots on the paper. Freeze them and pop them into a bag for a cool summer snack.
Anyway, off I go to start cooking then off to work so my husband can clean the kitchen. ;)
What time saving tricks do you guys have?
We celebrated her birthday over the weekend followed by my husbands party and it went very well. This morning my husband asks me, as he is making her bottle, "Aren't we supposed to be weaning her off of these soon?" Crap, he's right. That means more finger food, relatively scheduled meals, make ahead breakfasts. (I am out of the house by 6am and home with the other little one but 7am so breakfast is already a pain.) Then I start wondering where am I going to put all these meals and tiny tupper ware containers. Well, I think I've got it.
So There are several things I pick up for my lil munchkin to eat.
Cut up green beans, peas, carrots, broccoli chunks, any frozen or canned veggies really. Throw some in a cup and microwave or grab a small pot and toss in your veggies. Storage is simply your pantry or canned goods cabinet and they take seconds to make. Pair them with some fruit or pretzels.
I will hard boil some extra eggs and throw them back in the fridge for a pre-made breakfast or an afternoon snack.
Cook an extra chicken breast or meatballs when you make dinner. Bonus: split it with the kids and make some quesadillas for lunch or a salad and you got your lunch too with little work.
I am a big fan of chunks of block cheese with some fruit and crackers or cheerios. All very easy things to put together.
With all these little finger foods filling up the fridge and pantry I decided to throw together some Martha Stewart and Betty Crocker and up-cycled some old formula containers to use as storage.
Using small zipper bags and mini storage you can set these up for where ever you need them. For instance one will have small bags of cheerios, (instead of bulky boxes in the pantry.) pretzles, fruit snacks, snack pouches, really anything.
For the refigerator snacks like fruits and veggies I have small storage boxes,
![]() |
| The white one you see here houses small tea boxes, instant coffee and all those rogue k-cups and kool-aid packets that make such clutter in your cabinets. |
Last thing I am trying to do more of is making foods ahead, as I mentioned cooking a little extra the night before so you are all set for lunches and snacks the next day but I also like to load up the freezer. (Depending on space you can use those containers above to hold bags of freezer food.)
I like to make french toast sticks, mini pancakes, mini muffins etc. Its a good project for a lazy Sunday when I have an extra pair of hands for the baby. You can make up a ton of them in the time it would take to make a regular breakfast and on those busy mornings you toss 'em in the oven or microwave and the kids are happy. Not to mention all that breakfast stuff will make your house smell all yummy!
A new one I want to try is yogurt bites. Line a baking sheet with parchment paper and use an icing bag (or a ziplock with a hole cut in the corner.) and make dots on the paper. Freeze them and pop them into a bag for a cool summer snack.
Anyway, off I go to start cooking then off to work so my husband can clean the kitchen. ;)
What time saving tricks do you guys have?
Thursday, October 9, 2014
DIY's This Summer
One sick baby, two sick babies.... Thank the universe we did not decide to have a second sooner because I am already elbow deep in snot and poop.
We are enjoying our first year as a family and trying to get in all those story book times together such as apple picking, pumpkin picking and of course the local favorite, one of the many fairs that hit the area in the fall. This year we got an extra treat! The stomach flu... let me tell you how terrifying that is with kids all over the country getting sick and getting hospitalized. Fortunately, it hit us one at a time starting with my husband. He was down and out for two days, the poor guy, but once a year he always gets very sick then bounces right back. Then our daughter got it. No puking, (that's my girl) but definitely uncomfortable and lots of dirty diapers.
This was followed up by a seasonal cold and lord there are boogers... EVERYWHERE. Granted this is gross but it doesn't bother me so much. It bothers me more that my poor little one is feeling so crummy and anything I can do to help ie. aspirator and tissues just pisses her off more.
During the day I watch a little boy around my daughters age and they are the best of friends. In fact, they share binkies... This morning I started sneezing etc. I am so glad my husband is taking his vacation next week because one sick baby is enough for me, two, however, as well as being sick myself, is just far too much. So tonight it's a hot bath and fuzzy pj's, some Chicken noodle soup and an early bed time. I'm already exhausted.
This leads up to the fact that I have little time for projects left not to mention that I am currently looking for a house and we are slightly broke so it occupies a lot of my time. However, as promised, I have other little fun things I have done this summer. Such as,
Mission Impossible for Toddlers!
My niece and nephew are three and five years old and smart! Well, I like to have activities planned for them while they are here. A couple times in the summer my mom has Grandkids weekend. We go to grammy and papa's house and go camping.
All this required was some bright red yarn. (I know it's a little difficult to see but it's there.) and you zig zag from tree to tree, high and low and cris-crossing every which way.
In this case I was not able to gather all the materials so I didn't use the bells but when tied to the yarn the bells will jingle when the "lazer" it touched letting them know they lost. On the other side of the obstacle is a small path leading them right back to the starting line. Not everyone has this kind of land especially when you live in the city so this can easily be done indoors. A long hallway can do the trick with some scotch tape (don't ruin your paint job.) and the yarn and bells if you want.
You can do this with older kids and toddlers alike. I am thinking we can do the spy theme when my daughter is a little older and set this up at her birthday party. The kids can win little prizes is they get through. (You can use the same toys as you have in the goody bags for the kids so that everyone gets a fun toy.
I did one other project for them with the help of my brother.
Sone day I'm driving down the road and I see the frame for a papasan chair on the side of the road. (I am a big fan of free or cheap.) So my husband picks it up for me and it is brought to my parents where the base was promptly shattered. Sad but hopeful I assure them I am going to make a swing out of it so please don't burn it. My mother rolled her eyes so hard she may have sprained one but the chair went unburned. Finally, the last big camping trip I have got to do something with it or it goes in the bon fire. Got some big fat rope, the kids and went hunting for a tree.
With the help of my monkey brother we got it hung and the kids loved it. It was like a carnival ride and strong enough to hold my brother and I.
We are enjoying our first year as a family and trying to get in all those story book times together such as apple picking, pumpkin picking and of course the local favorite, one of the many fairs that hit the area in the fall. This year we got an extra treat! The stomach flu... let me tell you how terrifying that is with kids all over the country getting sick and getting hospitalized. Fortunately, it hit us one at a time starting with my husband. He was down and out for two days, the poor guy, but once a year he always gets very sick then bounces right back. Then our daughter got it. No puking, (that's my girl) but definitely uncomfortable and lots of dirty diapers.
This was followed up by a seasonal cold and lord there are boogers... EVERYWHERE. Granted this is gross but it doesn't bother me so much. It bothers me more that my poor little one is feeling so crummy and anything I can do to help ie. aspirator and tissues just pisses her off more.
During the day I watch a little boy around my daughters age and they are the best of friends. In fact, they share binkies... This morning I started sneezing etc. I am so glad my husband is taking his vacation next week because one sick baby is enough for me, two, however, as well as being sick myself, is just far too much. So tonight it's a hot bath and fuzzy pj's, some Chicken noodle soup and an early bed time. I'm already exhausted.
This leads up to the fact that I have little time for projects left not to mention that I am currently looking for a house and we are slightly broke so it occupies a lot of my time. However, as promised, I have other little fun things I have done this summer. Such as,
Mission Impossible for Toddlers!
My niece and nephew are three and five years old and smart! Well, I like to have activities planned for them while they are here. A couple times in the summer my mom has Grandkids weekend. We go to grammy and papa's house and go camping.
All this required was some bright red yarn. (I know it's a little difficult to see but it's there.) and you zig zag from tree to tree, high and low and cris-crossing every which way.In this case I was not able to gather all the materials so I didn't use the bells but when tied to the yarn the bells will jingle when the "lazer" it touched letting them know they lost. On the other side of the obstacle is a small path leading them right back to the starting line. Not everyone has this kind of land especially when you live in the city so this can easily be done indoors. A long hallway can do the trick with some scotch tape (don't ruin your paint job.) and the yarn and bells if you want.
You can do this with older kids and toddlers alike. I am thinking we can do the spy theme when my daughter is a little older and set this up at her birthday party. The kids can win little prizes is they get through. (You can use the same toys as you have in the goody bags for the kids so that everyone gets a fun toy.
I did one other project for them with the help of my brother.
Sone day I'm driving down the road and I see the frame for a papasan chair on the side of the road. (I am a big fan of free or cheap.) So my husband picks it up for me and it is brought to my parents where the base was promptly shattered. Sad but hopeful I assure them I am going to make a swing out of it so please don't burn it. My mother rolled her eyes so hard she may have sprained one but the chair went unburned. Finally, the last big camping trip I have got to do something with it or it goes in the bon fire. Got some big fat rope, the kids and went hunting for a tree.
With the help of my monkey brother we got it hung and the kids loved it. It was like a carnival ride and strong enough to hold my brother and I.
Assuming the wood holds out through the winter I will be using a very large cushion I made to cover it but an old comforter will do just fine. I don't have a photo yet of the kids up high but that swing hums and the rungs of the chair serve as handles and foot wedges without the threat of tiny busted fingers. They had such a blast that they wanted to keep it up after the rain started. Until, of course, there was talk of s'mores and fire.
Sadly, the camp is now closed but we certainly enjoyed it while it lasted.

Wednesday, October 1, 2014
Rainy Day Projects
I love rainy days and fall in New England certainly provides plenty of those. While they are the perfect time to catch up on a book or snuggle in some PJs. unfortunately, if your like me, I rarely sit still for long and I'm soon looking for something to keep my hands busy.
Today, for instance, I got some work done on my jewelry box. Years ago my step Father got me a jewelry box, as I had asked for one. This was something left behind in an apartment he was clearing out. It was a wooden stand up with drawers. The drawers and cabinet were lined with a rose pink felt and the cabinet door had a cheesy stained glass flower. While this is perfect for a little kid or little old ladies, it's not really my taste.

I saw a potential in this piece though. In a previous post I had mentioned I was starting work and a couple of other projects, an armoire and a china hutch. Well, since I haven't done any woodworking in a very long time I decided the jewelry box would be the perfect practice run since I didn't care about the box anyway.
(The other two pieces were handed down to me by my mother but they were so damaged from several generations of children she just gave me a good luck and let me know how that works out for ya.)
After two days of sanding and deconstruction I got all the finish and stain off, next I will use an ebony stain on it but as I said it's rainy so I will have to wait a couple days. Since stain was put on hold for a bit I decided to move forward with planning. (I'm a wing it kinda girl.) I didn't like the pink felt so I started prying it all out of the drawers and the cabinet. Each piece of felt was wrapped around a cardboard piece. Felt would have been the preferred material but I didn't have any. Instead I used some contact paper I had left over from redoing our gross back splash and wrapped each piece of liner. It started out a little wrinkly because it's paper wrapped around fabric but it accomplished what I needed it to.
Especially when I have refilled the drawers you will not see much more of the liners.
The cabinet had a mirror in the back that I considered removing but washed it and it cleaned up very nicely. Hopefully the rain will hold off a little tomorrow so I can get the first layer of stain on it.
In the cabinet there is a rotating hook that is a crappy plastic and painted metallic gold. That has already been removed and will be spray painted a matte black with Krylon plastic spray paint. That stuff is awesome, I used it to paint some old baby formula containers and turned them into craft storage containers.
So when the jewelry box is finished I will post photos of the finished product and how I did it.
Also, if you have any questions on any projects I do or would like to know how I did anything I post on here feel free to comment and I can write another post with photos on that particular project.
See you again soon.
Today, for instance, I got some work done on my jewelry box. Years ago my step Father got me a jewelry box, as I had asked for one. This was something left behind in an apartment he was clearing out. It was a wooden stand up with drawers. The drawers and cabinet were lined with a rose pink felt and the cabinet door had a cheesy stained glass flower. While this is perfect for a little kid or little old ladies, it's not really my taste.

I saw a potential in this piece though. In a previous post I had mentioned I was starting work and a couple of other projects, an armoire and a china hutch. Well, since I haven't done any woodworking in a very long time I decided the jewelry box would be the perfect practice run since I didn't care about the box anyway.
(The other two pieces were handed down to me by my mother but they were so damaged from several generations of children she just gave me a good luck and let me know how that works out for ya.)
After two days of sanding and deconstruction I got all the finish and stain off, next I will use an ebony stain on it but as I said it's rainy so I will have to wait a couple days. Since stain was put on hold for a bit I decided to move forward with planning. (I'm a wing it kinda girl.) I didn't like the pink felt so I started prying it all out of the drawers and the cabinet. Each piece of felt was wrapped around a cardboard piece. Felt would have been the preferred material but I didn't have any. Instead I used some contact paper I had left over from redoing our gross back splash and wrapped each piece of liner. It started out a little wrinkly because it's paper wrapped around fabric but it accomplished what I needed it to.
Especially when I have refilled the drawers you will not see much more of the liners.
The cabinet had a mirror in the back that I considered removing but washed it and it cleaned up very nicely. Hopefully the rain will hold off a little tomorrow so I can get the first layer of stain on it.
In the cabinet there is a rotating hook that is a crappy plastic and painted metallic gold. That has already been removed and will be spray painted a matte black with Krylon plastic spray paint. That stuff is awesome, I used it to paint some old baby formula containers and turned them into craft storage containers.
So when the jewelry box is finished I will post photos of the finished product and how I did it.
Also, if you have any questions on any projects I do or would like to know how I did anything I post on here feel free to comment and I can write another post with photos on that particular project.
See you again soon.
Tuesday, September 16, 2014
Make your whole house smell like fall.
That time of year again. Once we get sick of humid summer here comes the crisp breeze of fall. Leaf peepers clogging up our highways, beautiful colors, pulling out the boots and jackets, lets not forget the oh so wonderful scarves. Still, when the windows are closed up tight at night against the cold you can lose that fresh smell of seasons changing. I personally am I huge fan of that apple smell of fall. It brings up memories of holidays, family, the familiar smells of cooking and the ever present smell of fall scented candles.
If your anything like me, I always like that smell in my house. So after a little Pintresting, (yes I'm addicted) I found some lovely ways of getting the whole house to have that aroma of food and family. Right now apples are cheap and in season and most people are picking them up anyway to whip up some apple crisp or a flaky pie. So when you find some with a bruise or worm holes, don't throw them away. Make a simmering potpourri.
Simply put, cook up the scent on your own.
You will need:
Water
A Small pot
An apple or two
An orange or two
Dash of vanilla extract
(opt.) pinch of cinnamon, cloves, nutmeg.. really anything that makes your house smell yummy when your baking. Your amounts don't need to be specific, it really all depends on how much you like certain spices.
For instance, I go a little heavier with cinnamon and vanilla and lighter on nutmeg and cloves.
Really anything you like the smell of can be made this way.
Place some water in the pot and drop in all the ingredients. Throw them on the stove and let simmer for a little while. You can turn it off when the scent reaches what your looking for and always turn it back on later.
If your anything like me, I always like that smell in my house. So after a little Pintresting, (yes I'm addicted) I found some lovely ways of getting the whole house to have that aroma of food and family. Right now apples are cheap and in season and most people are picking them up anyway to whip up some apple crisp or a flaky pie. So when you find some with a bruise or worm holes, don't throw them away. Make a simmering potpourri.
Simply put, cook up the scent on your own.
You will need:
Water
A Small pot
An apple or two
An orange or two
Dash of vanilla extract
(opt.) pinch of cinnamon, cloves, nutmeg.. really anything that makes your house smell yummy when your baking. Your amounts don't need to be specific, it really all depends on how much you like certain spices.
For instance, I go a little heavier with cinnamon and vanilla and lighter on nutmeg and cloves.
Really anything you like the smell of can be made this way.
Place some water in the pot and drop in all the ingredients. Throw them on the stove and let simmer for a little while. You can turn it off when the scent reaches what your looking for and always turn it back on later.
It's the simplest of recipes and packs quite a punch.
Ah how I love fall. I'm sure there will be many more fall posts as the cool air rolls into the northeast.
Enjoy!
Subscribe to:
Posts (Atom)